Multi-Factor Authentication (MFA) adds an extra layer of security to your Affinect account by requiring a verification code in addition to your password. In this guide, you’ll learn how to enable MFA for your own account and enforce it for your team members to ensure better access control and data protection.
Affinect
Access Your Profile
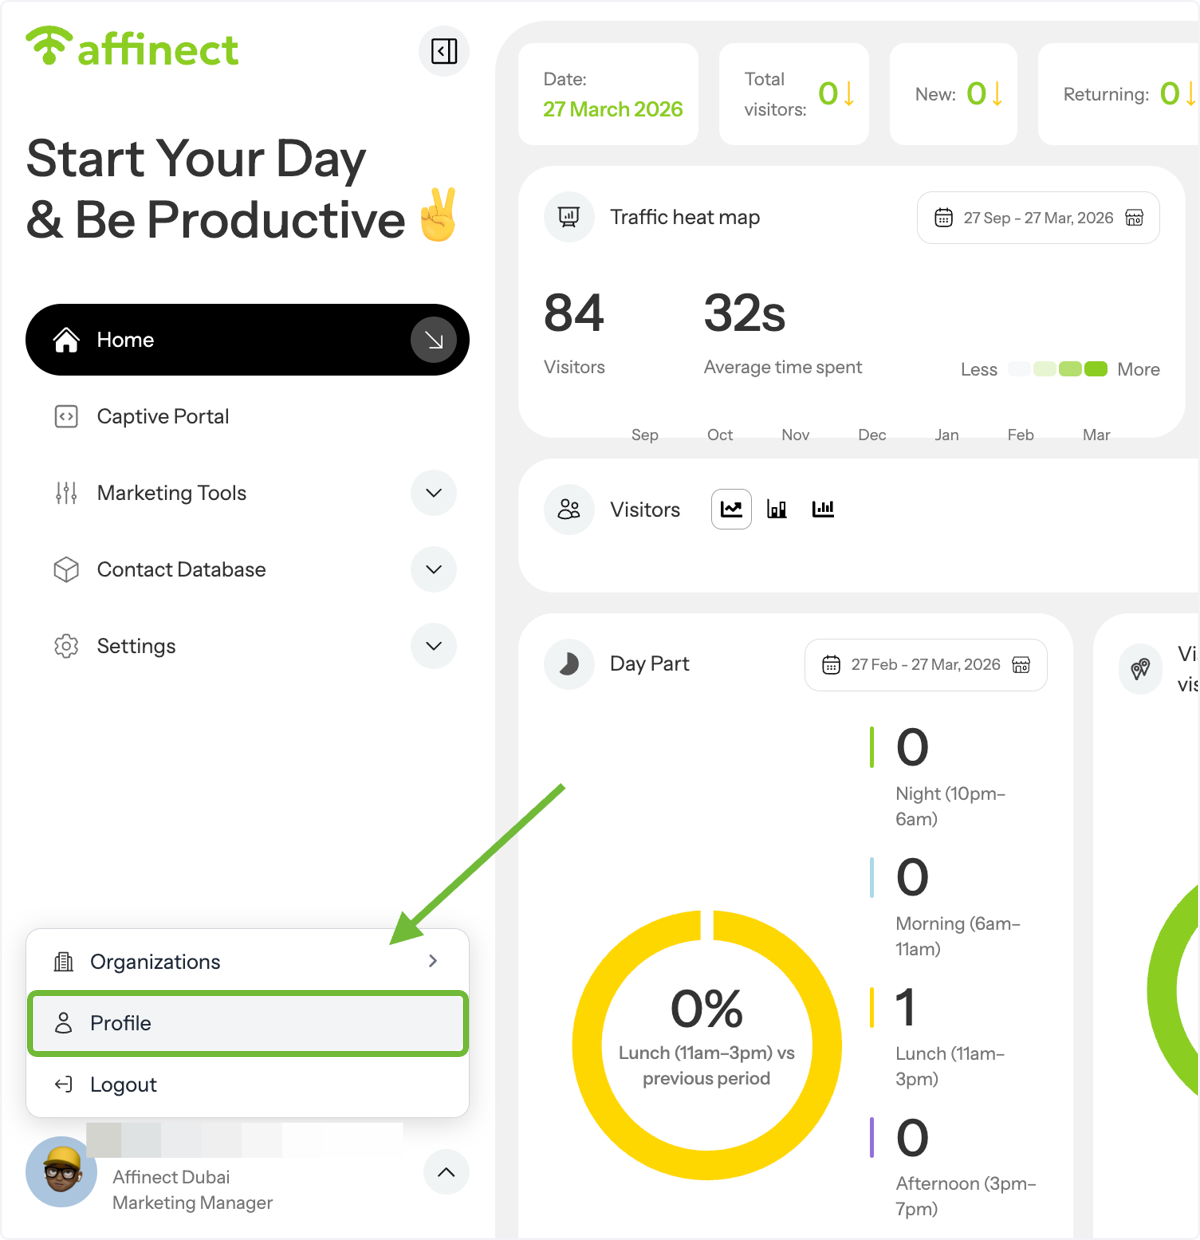
From the home dashboard, go to the bottom-left corner and click on your Profile.
Scroll down to MFA Settings
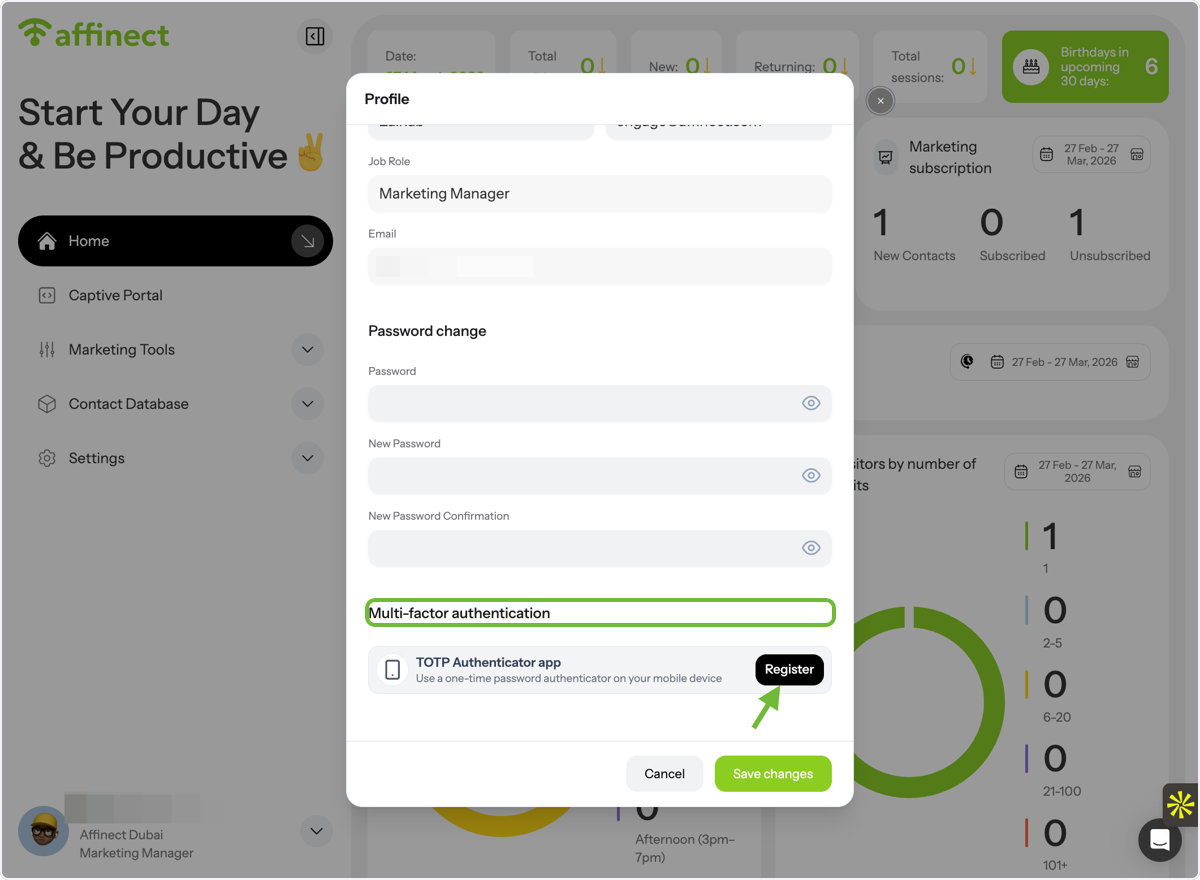
Scroll down within your profile settings to find Multi-Factor Authentication, then click Register.
Set Up Authenticator App
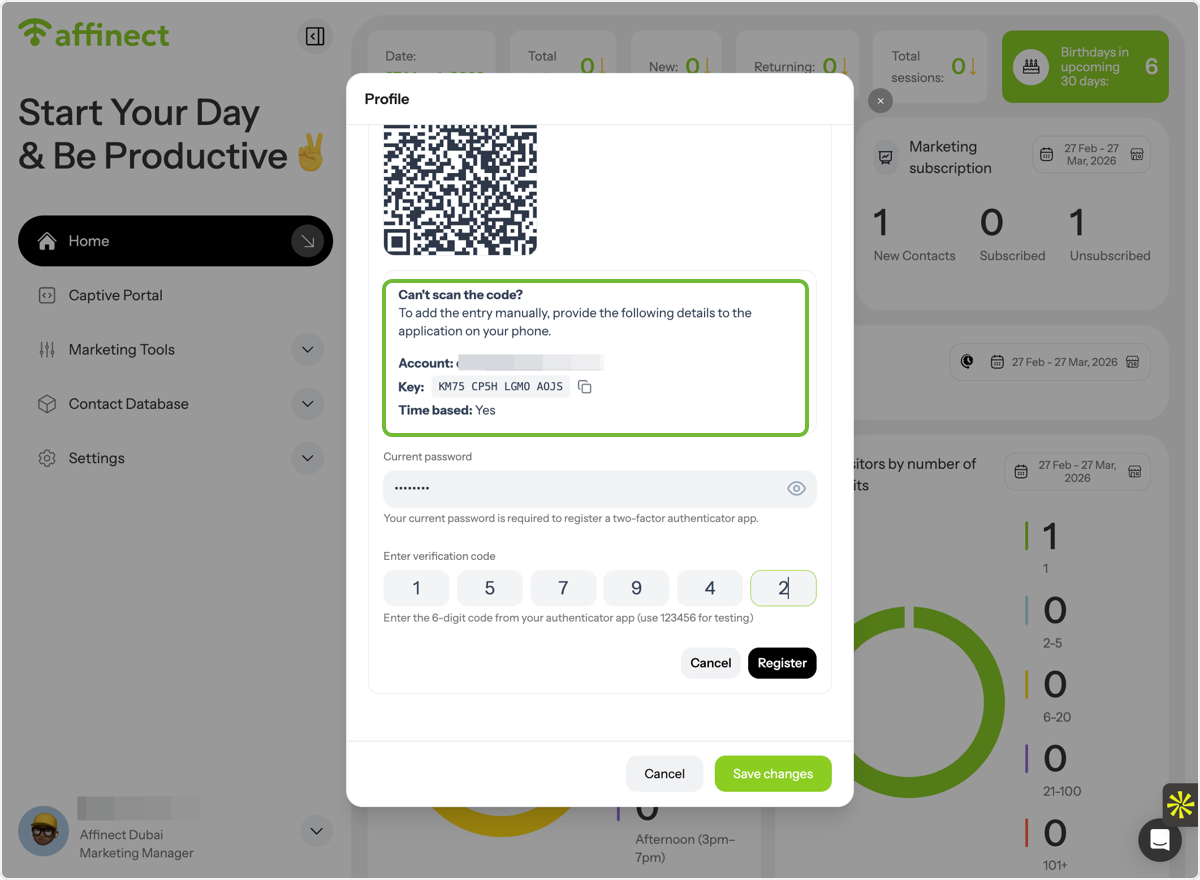
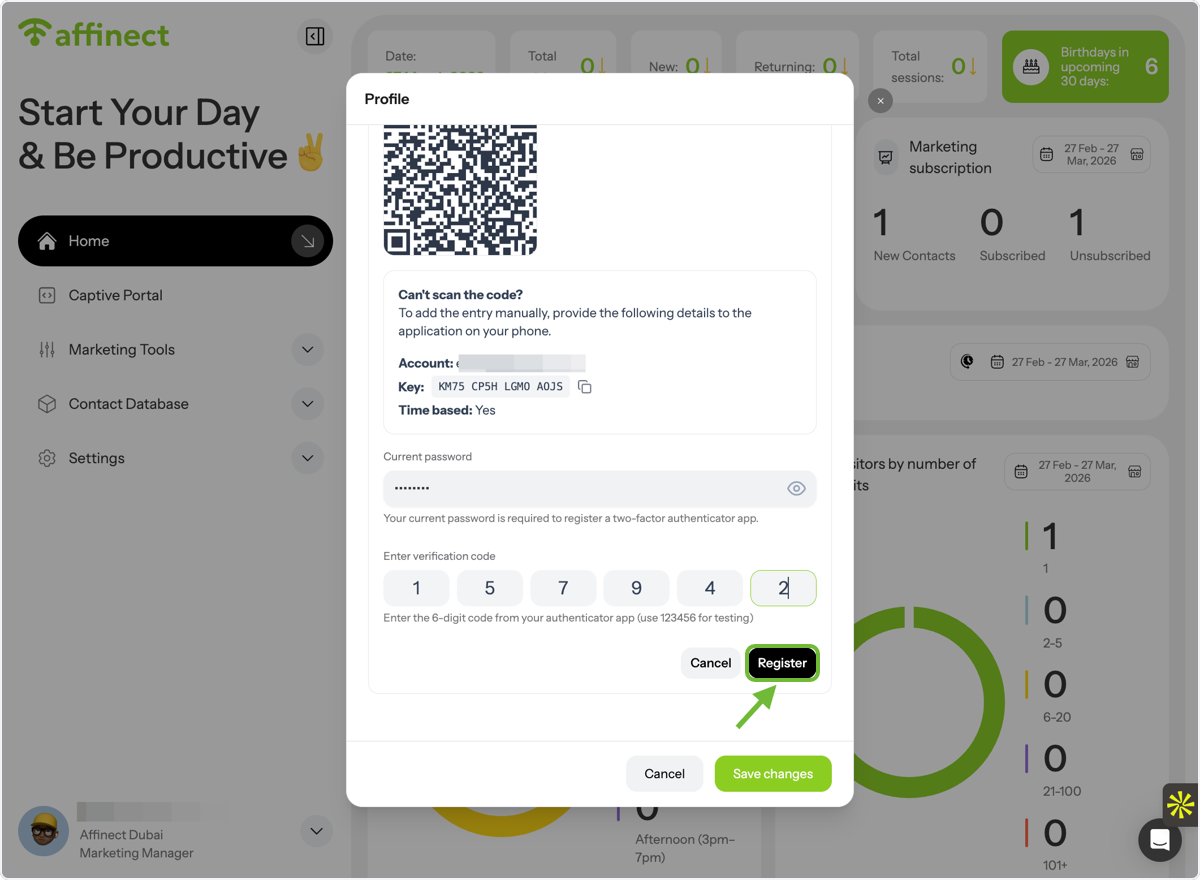
Scan the QR code using your preferred authenticator app (such as Google Authenticator). If you’re unable to scan, manually enter the provided account details into the app.
Verify and Register
Enter the verification code generated by your authenticator app and click Register.
Save Changes
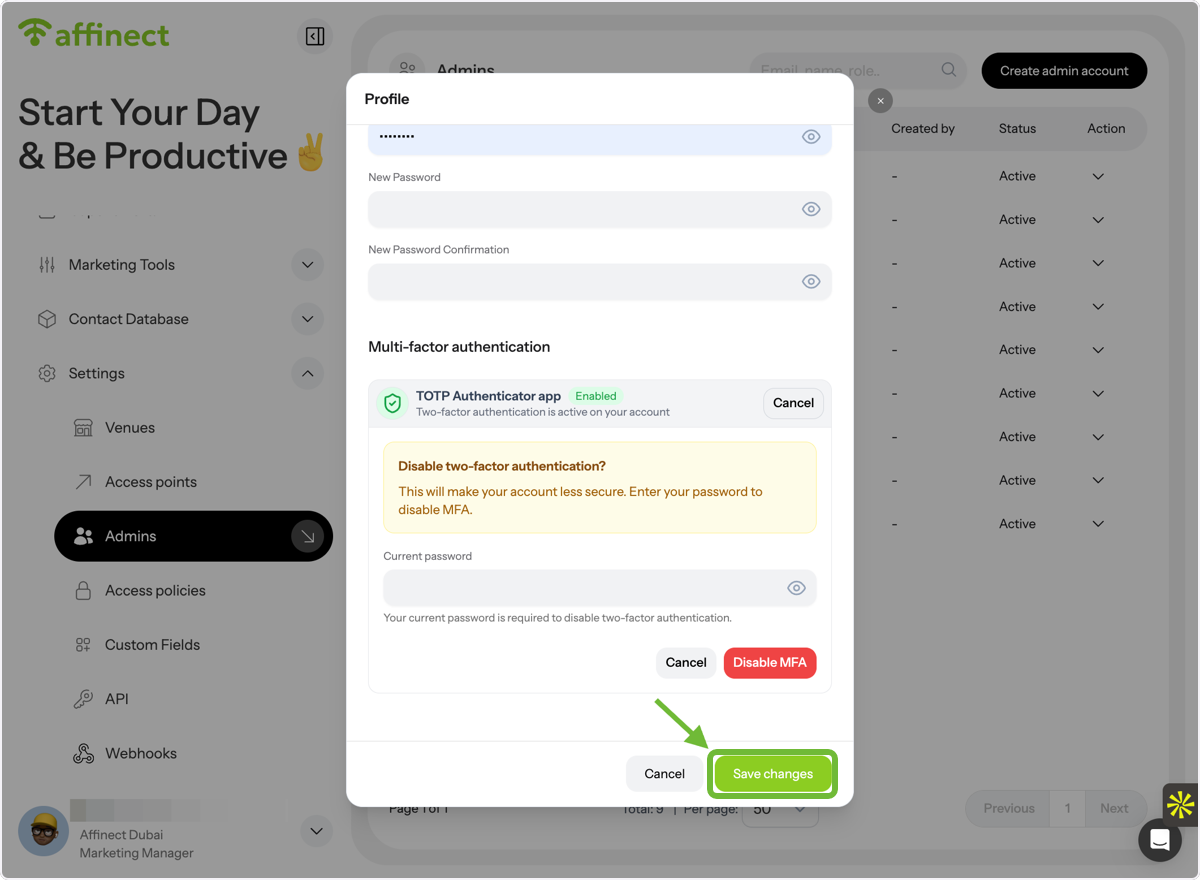
Click Save Changes to enable MFA. You can also disable it later if needed.
Navigate to Admin Settings
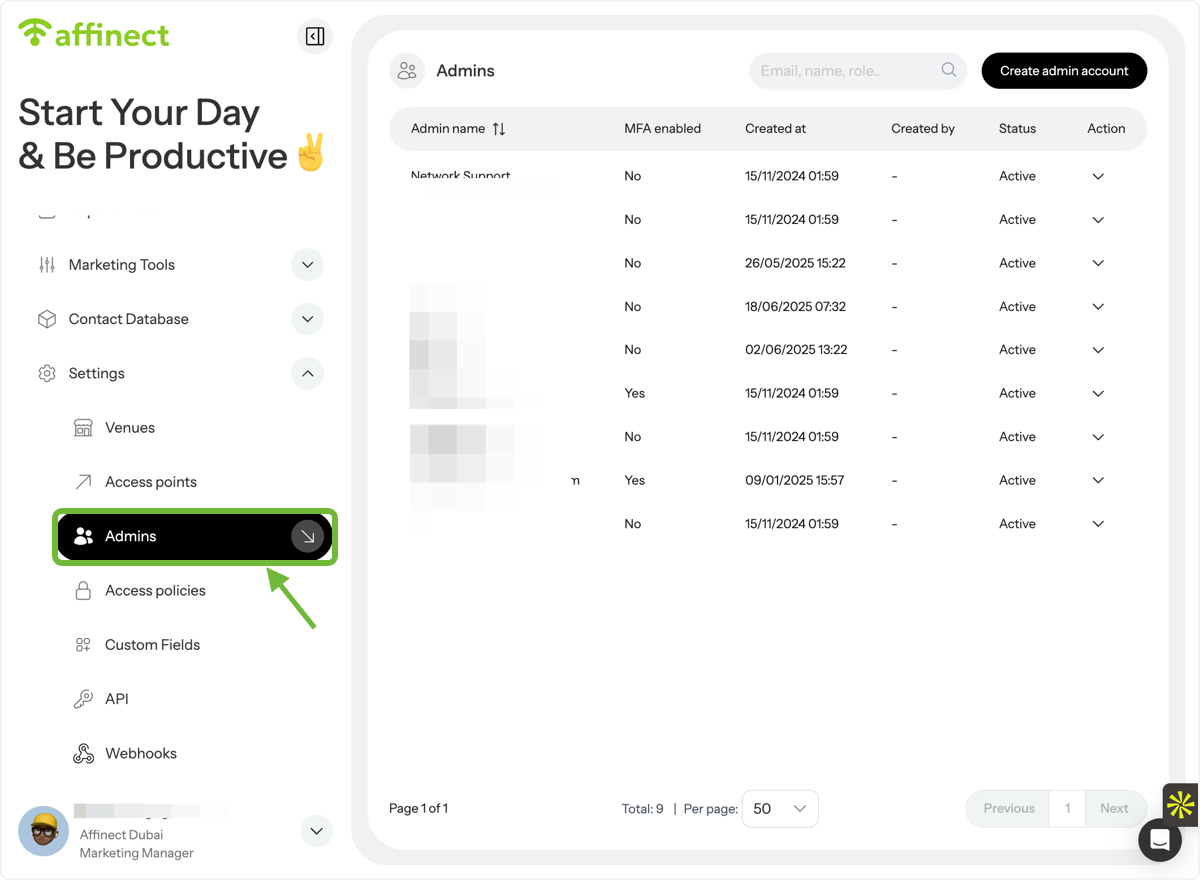
To enable MFA for team members, go to Settings and open the Admins section.
Select Team Member to Edit
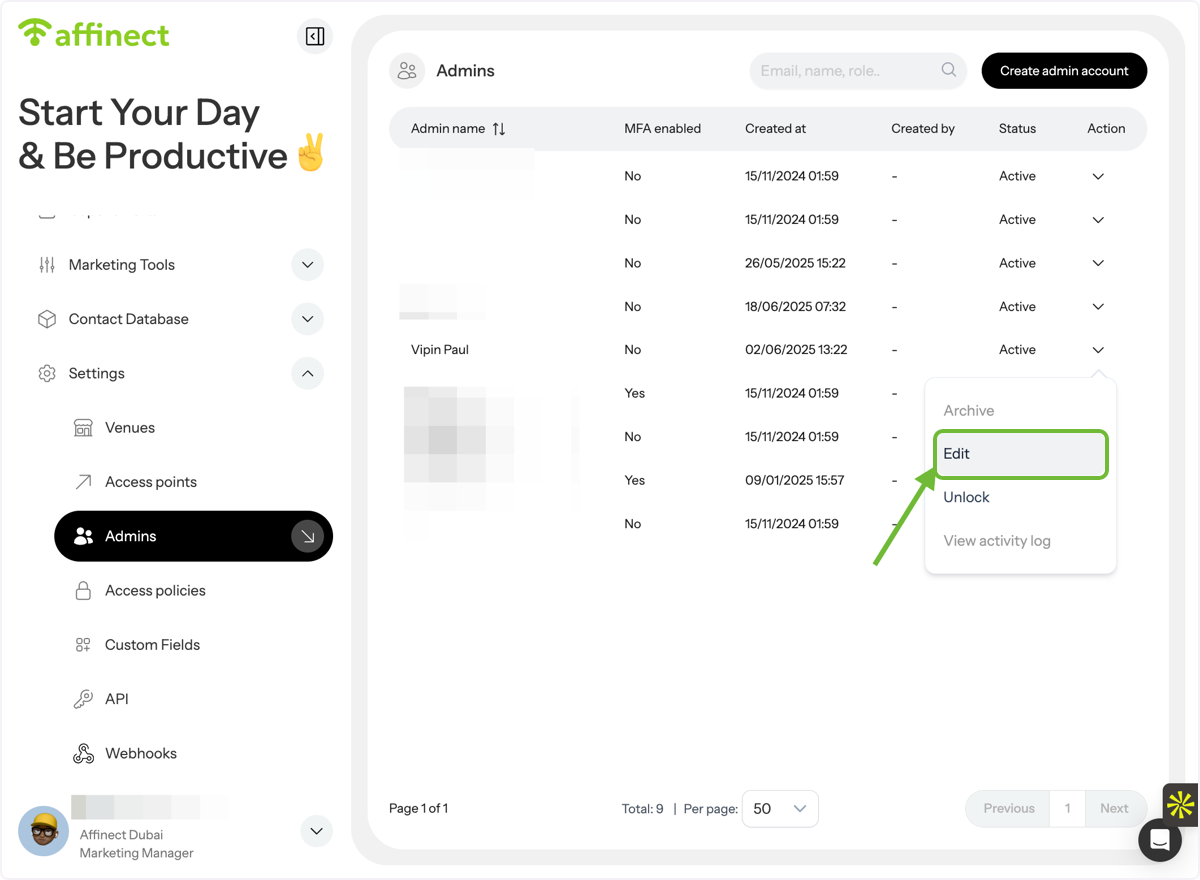
Find the team member and click Edit from the dropdown next to their profile.
Enable MFA Requirement
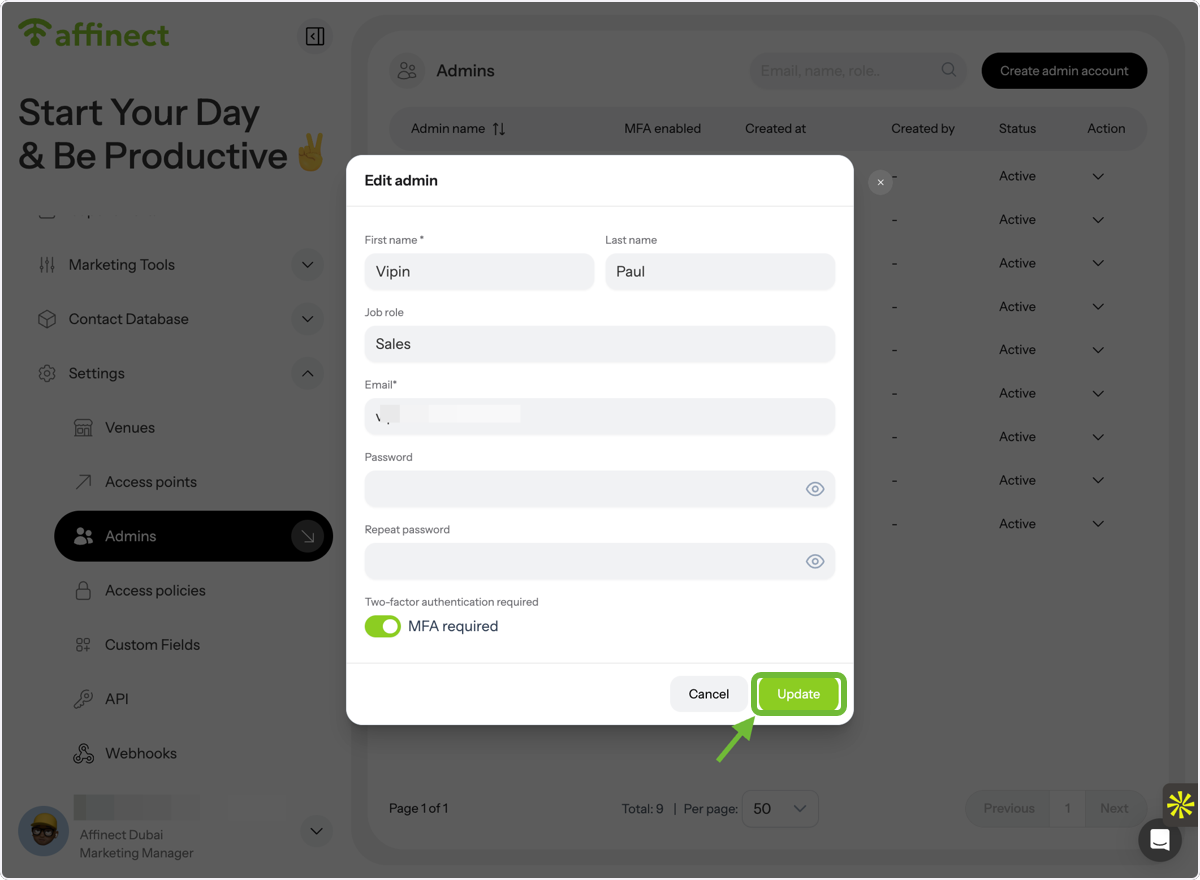
Toggle on MFA Required to enforce multi-factor authentication for that user.
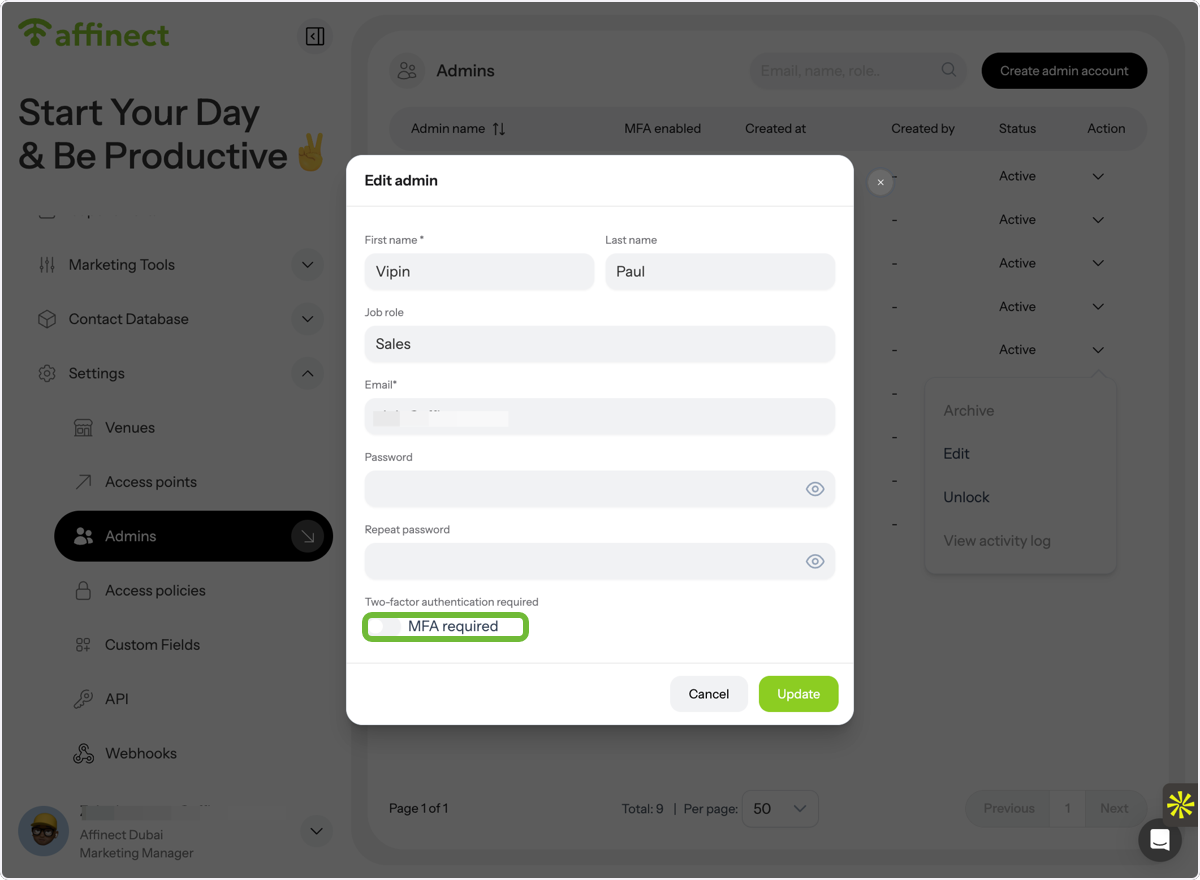
Update Settings
Click Update to apply the changes. Tada! You’re all set! You now know how to enable MFA for both your account and your team.