Build a fully customised digital stamp card that rewards your guests for every visit or purchase. This guide walks you through setting up your loyalty program, customising its design, configuring rewards, assigning validators, and monitoring enrolled customers before publishing your program.
Affinect
Program Setup
Start by creating your loyalty program, selecting where it will be available, and configuring its validity, usage limits, and redemption settings.
Customise the appearance of your digital stamp card to match your brand, including colours, logos, stamps, content, and redemption settings.
Create milestones that unlock rewards as guests collect more stamps.
Assign staff members who are authorised to issue stamps and validate customer rewards.
Monitor guests participating in your loyalty program and track overall program performance before publishing.
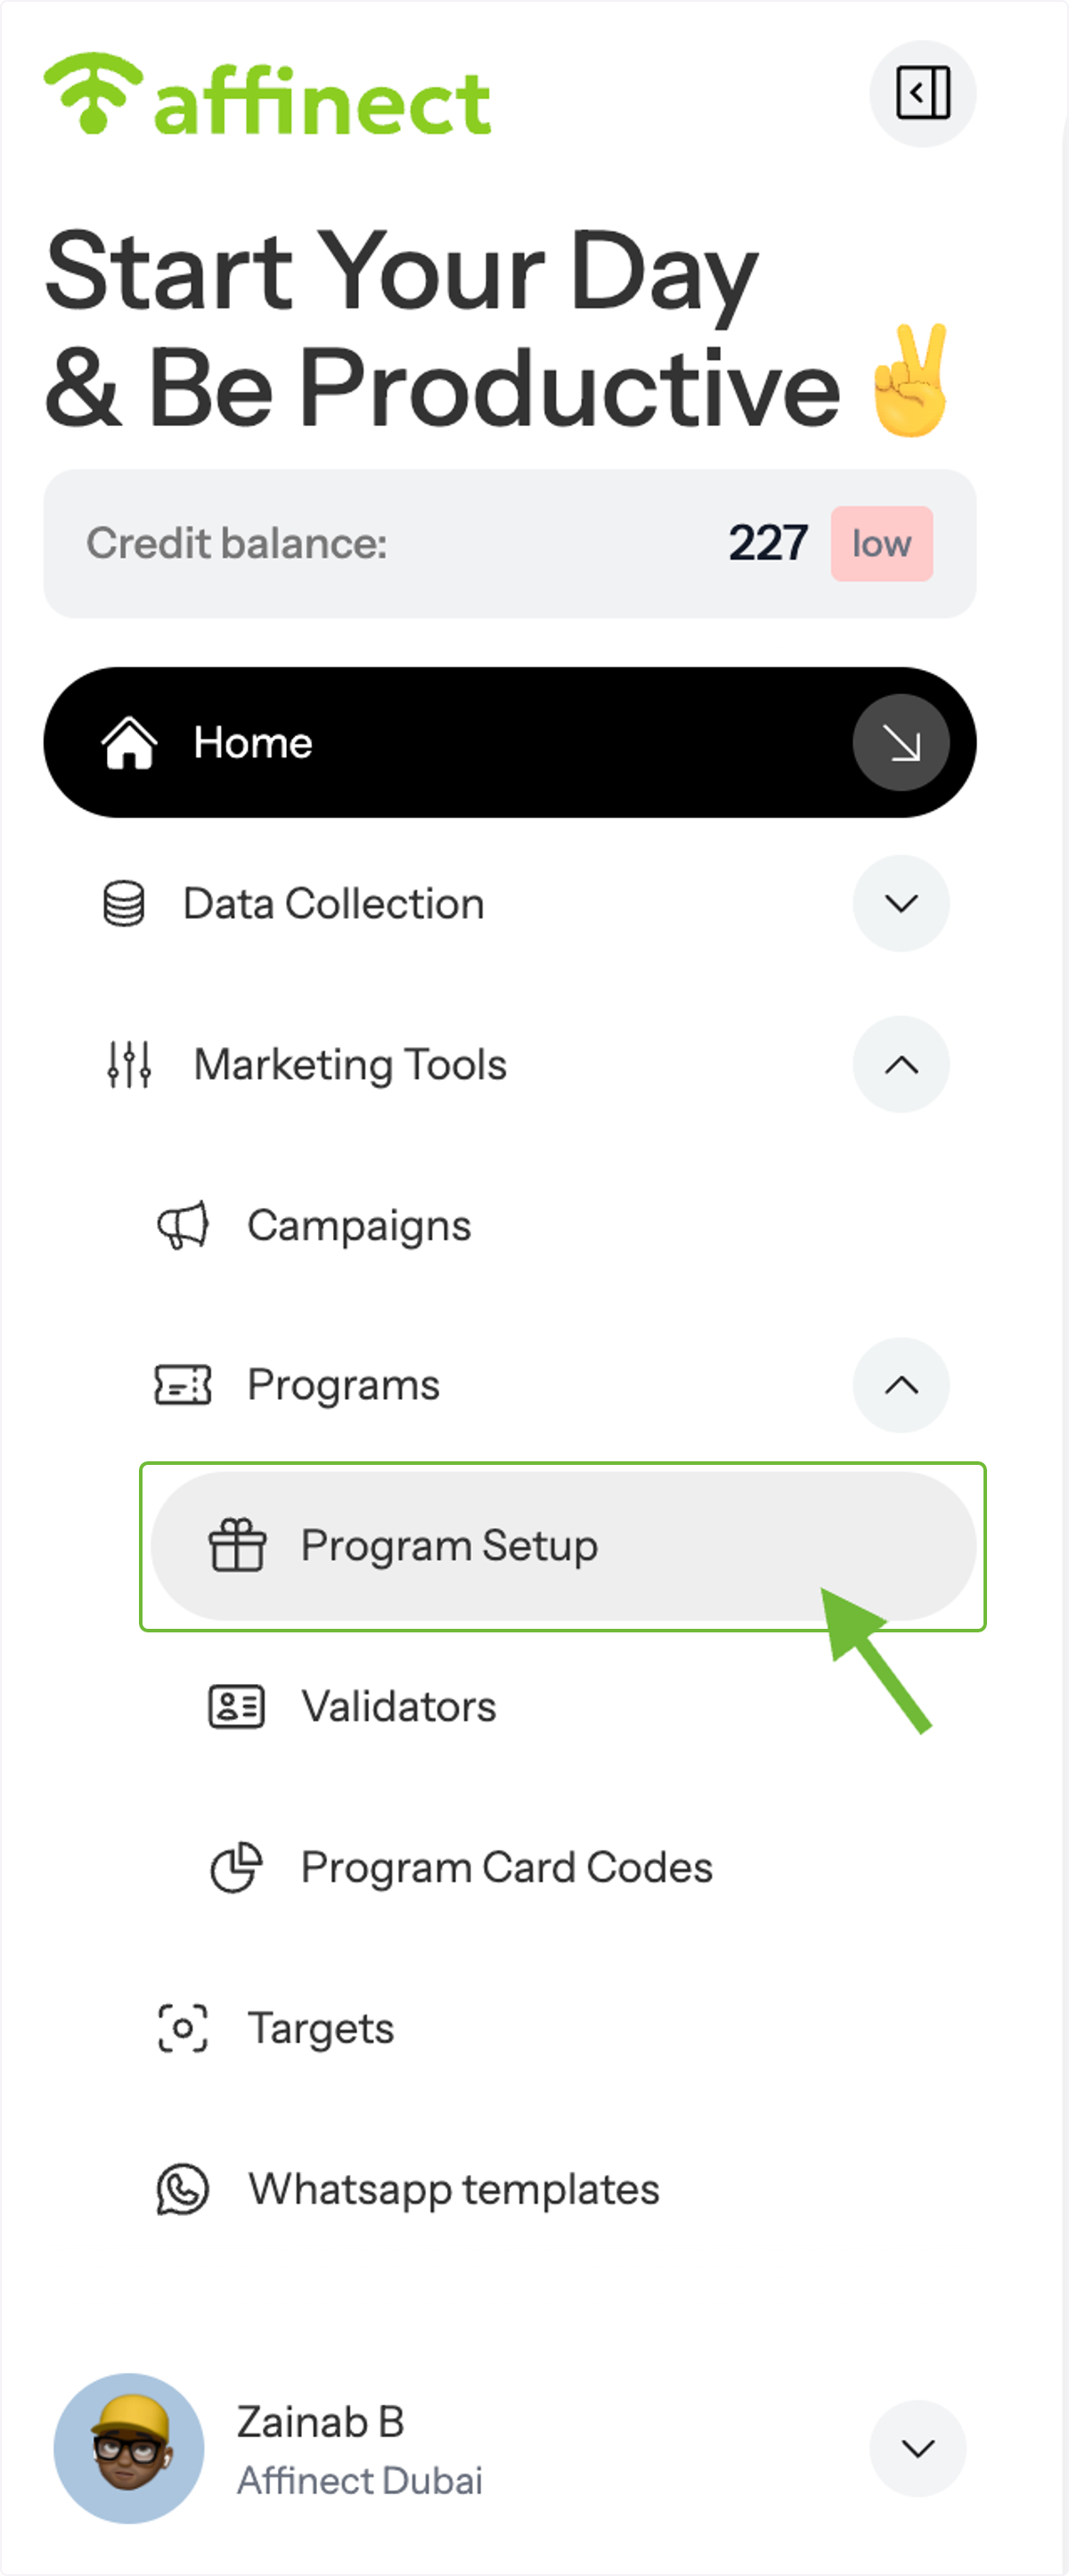
Open Program Setup
From the left-hand menu, navigate to Programs and select Program Setup.
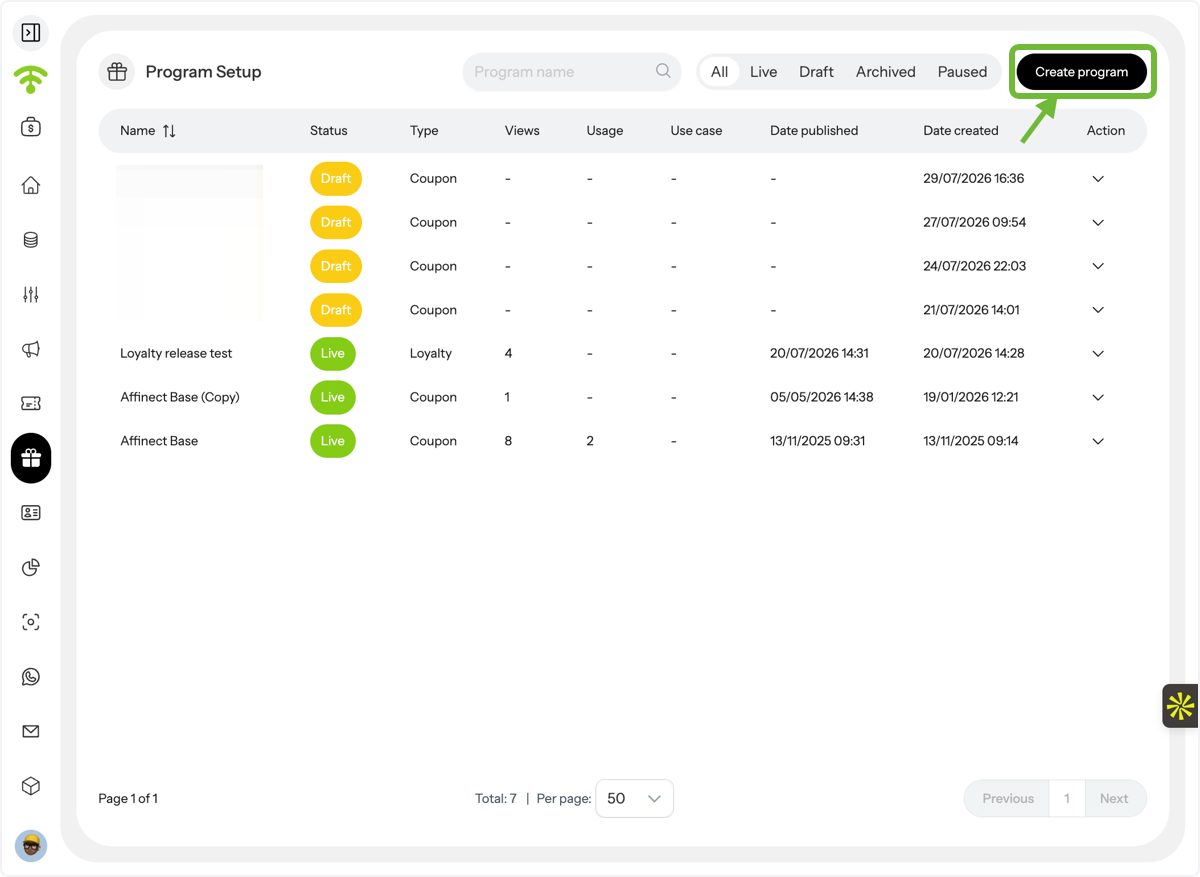
Create a New Program
Your Program Setup page displays all existing programs, including both Stamp-Based Loyalty and Coupon-Based programs.
Here you can:
- View each program's status (Live, Draft, Paused or Archived)
- Edit existing programs
- View program analytics from the Actions menu
To create a new program, click Create Program in the top-right corner.
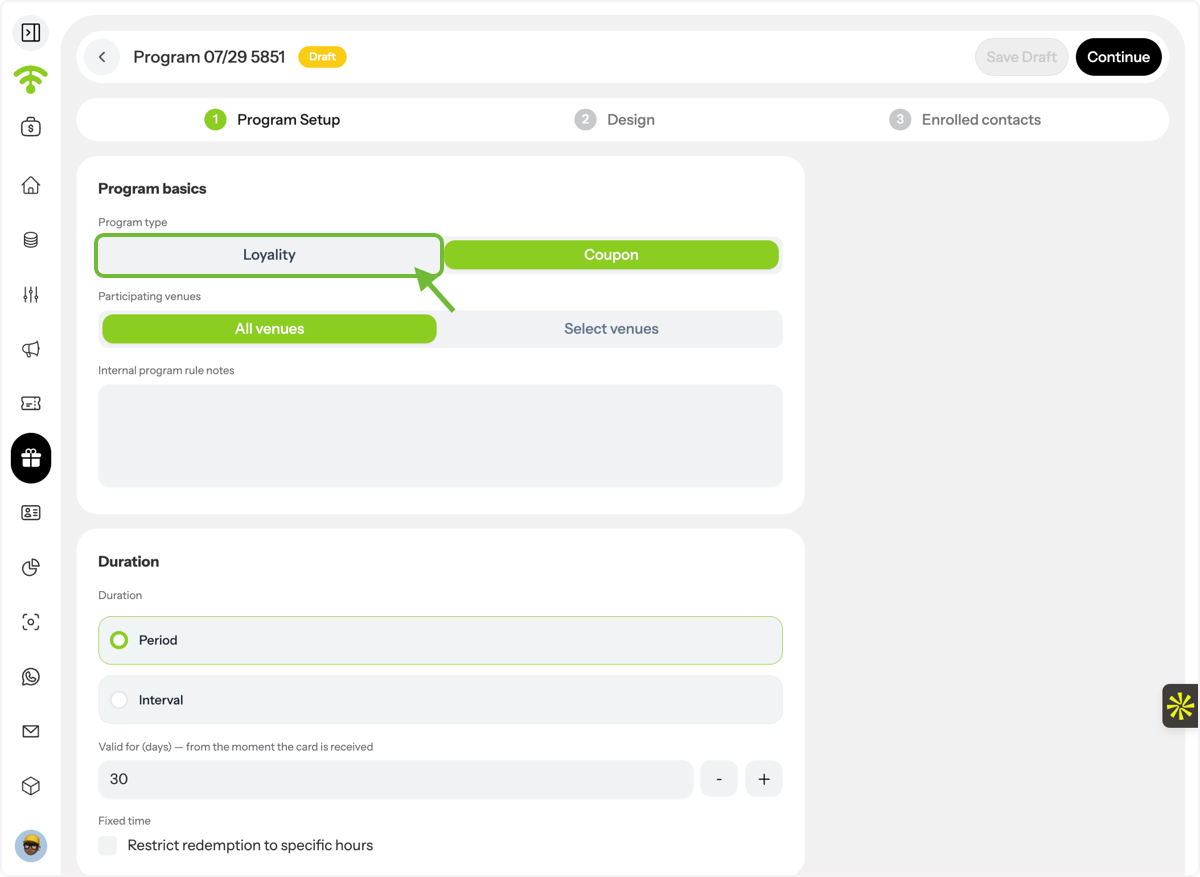
Choose Your Program Type
Select the type of program you would like to create:
- Loyalty Program (Stamp Card)
- Coupon Program
For this guide, select Loyalty Program.
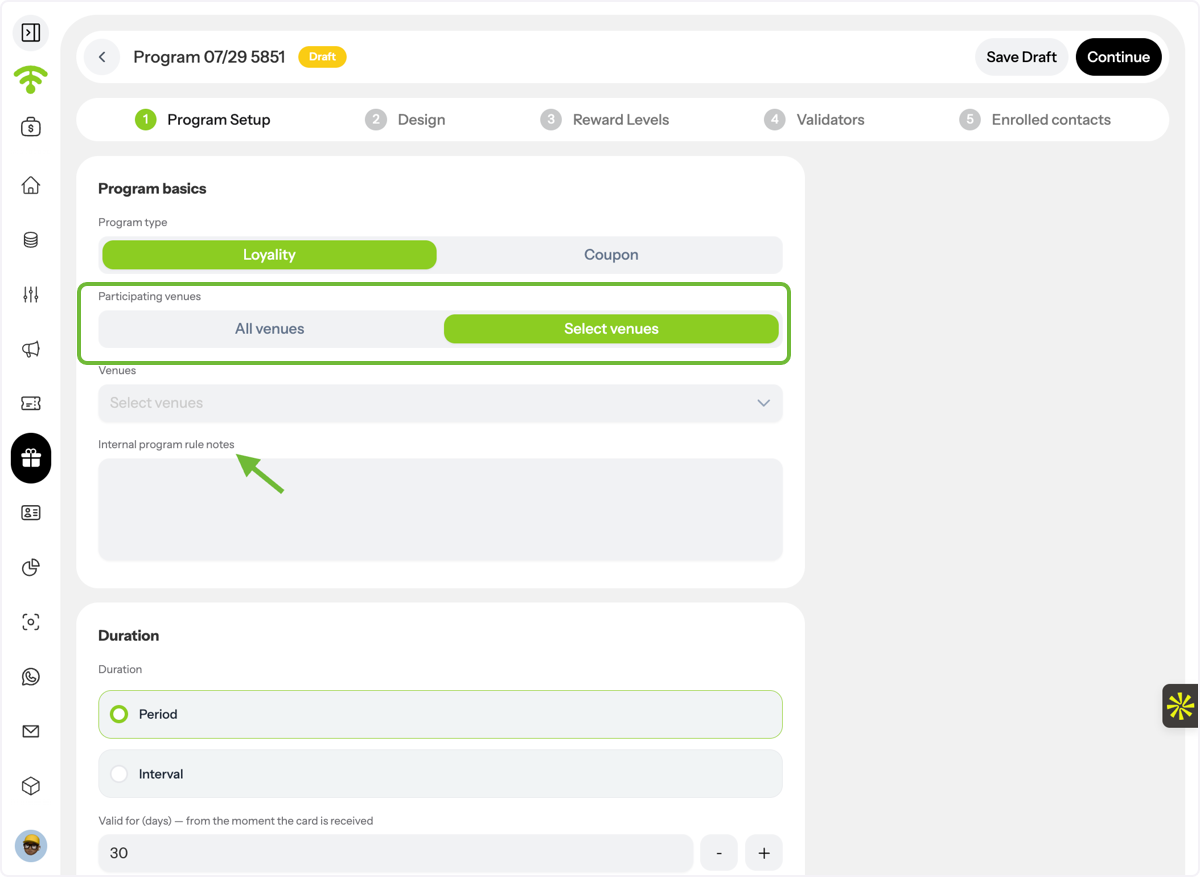
Select Your Venue
Choose where this loyalty program will be available.
You can:
- Apply it to All Venues
- Select one or multiple specific venues
You can also add Internal Program Notes for your staff. These notes are only visible internally and help document important information about the program
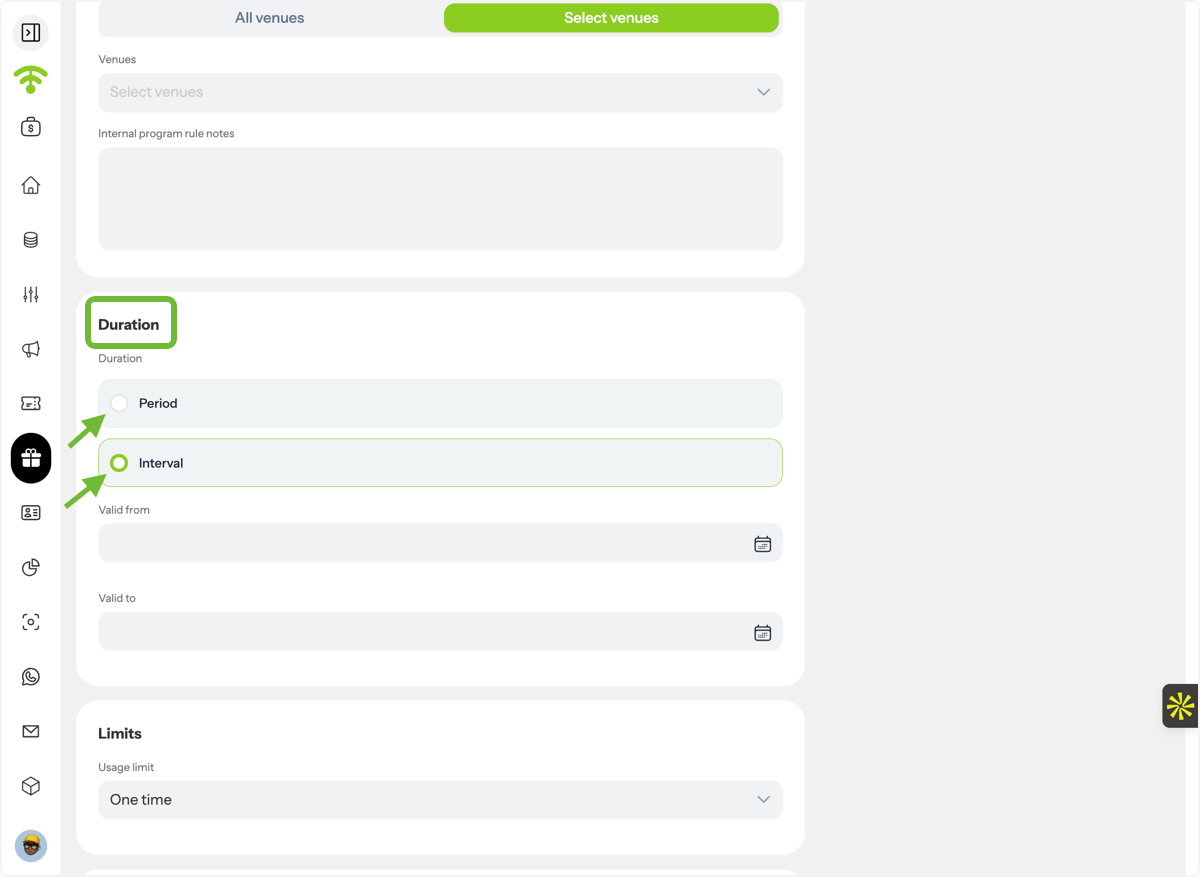
Set the Program Duration
Choose how long your loyalty program will remain active.
Available options include:
- Valid for a specific number of days
- Valid between a start date and an end date
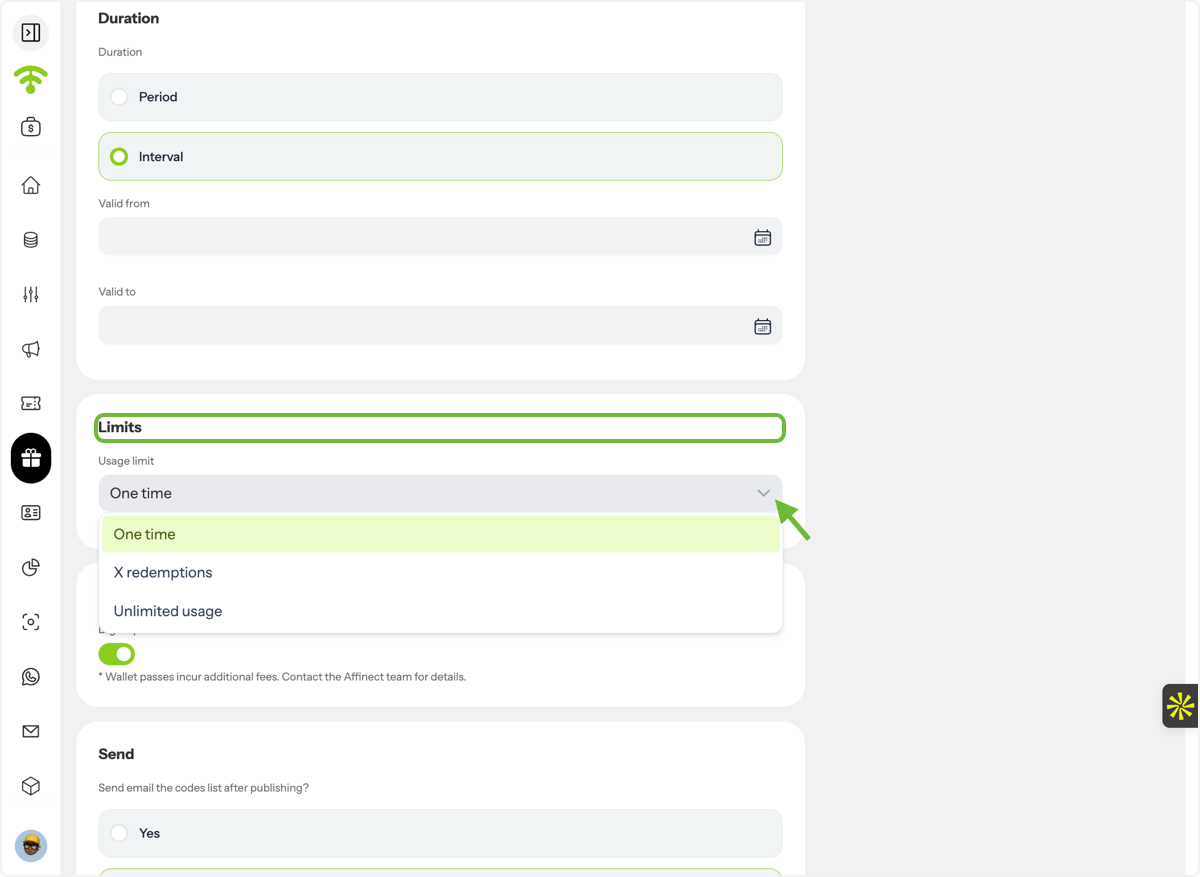
Set Program Usage Limits
Choose how often a guest can redeem rewards within this program.
Options include:
- One-time redemption
- A specific number of redemptions
- Unlimited redemptions
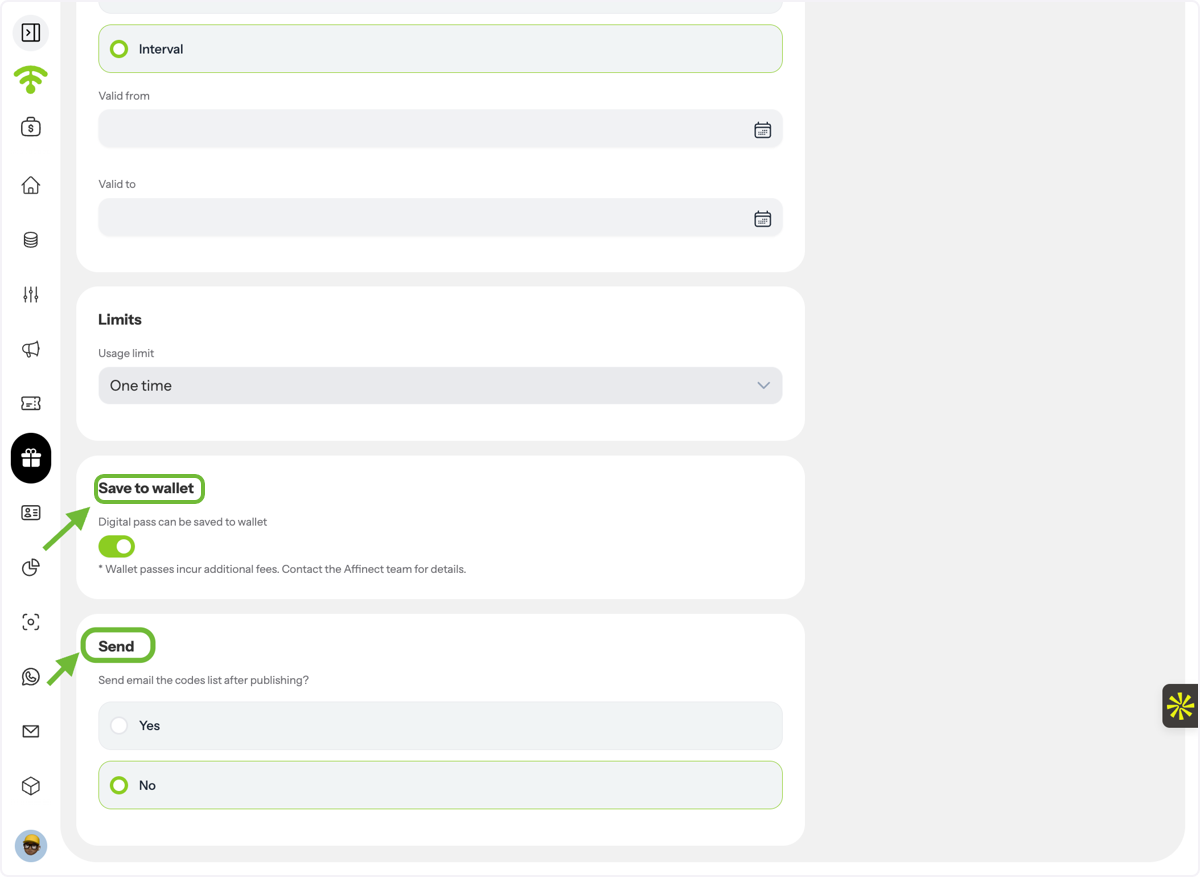
Configure Additional Options
You can enable additional features before publishing:
- Allow guests to save the loyalty card to their digital wallet
- Receive redemption codes by email after the program is published for easier redemption management.
Design
Customise General Appearance
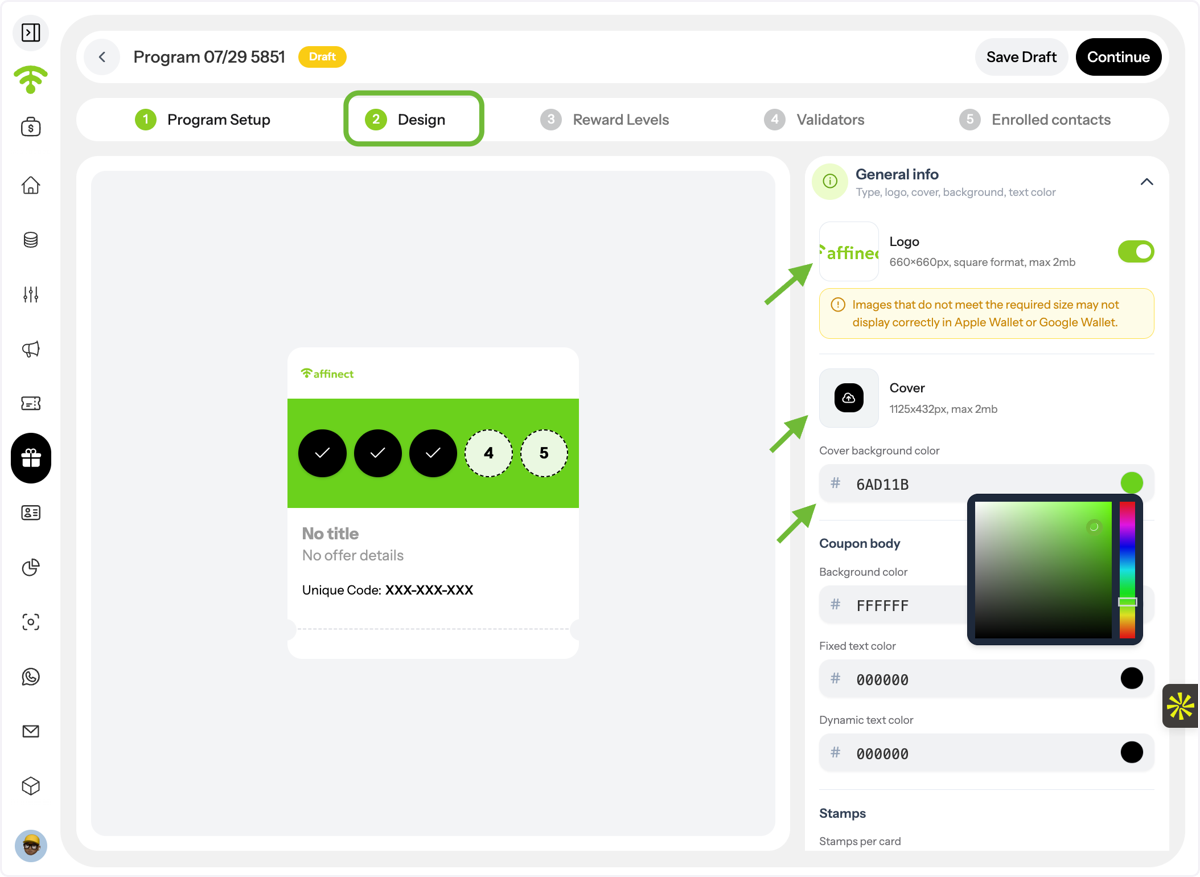
Under General Information, personalise your loyalty card by:
- Uploading your logo (or hiding it using the toggle)
- Uploading a cover image
- Selecting a background colour instead of an image
Customise Card Colours
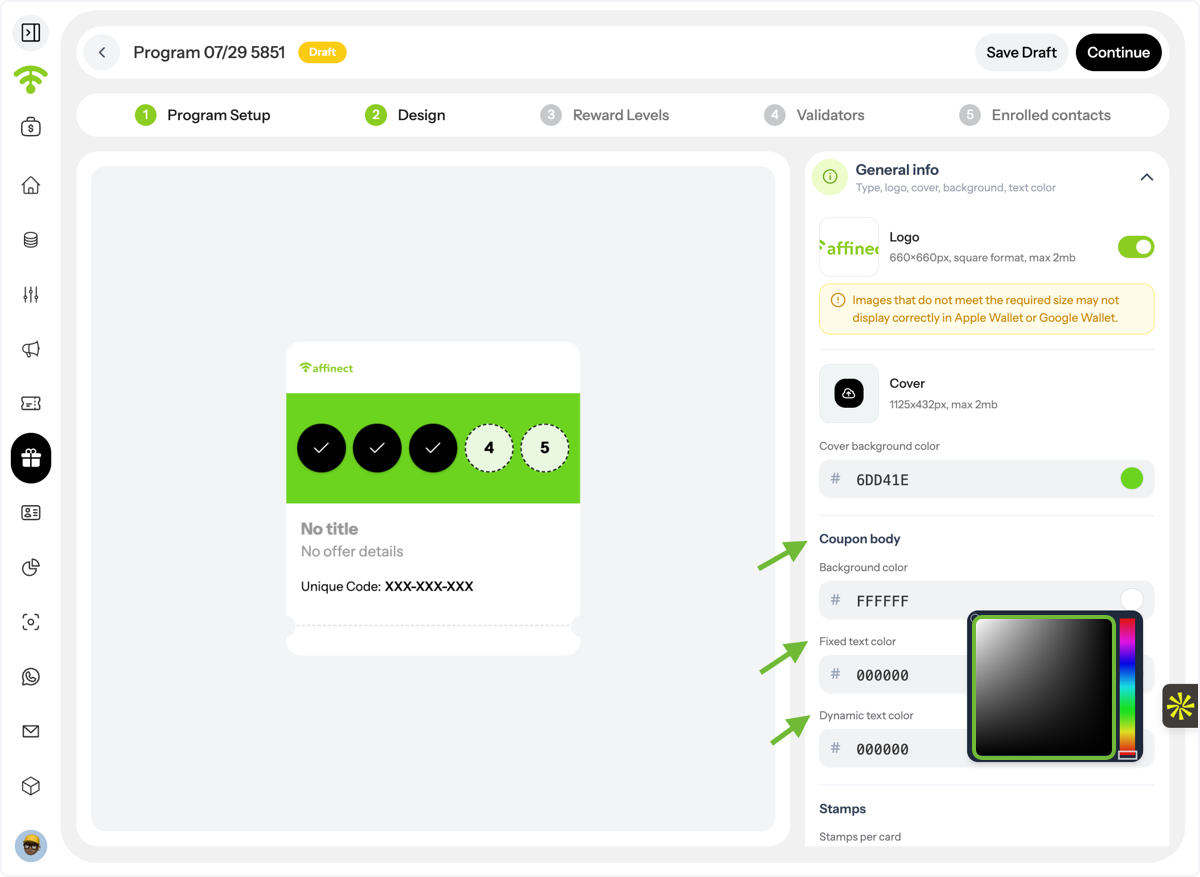
Adjust the appearance of your loyalty card by selecting:
- Card background colour
- Fixed text colour
- Dynamic text colour
This helps maintain consistency with your brand identity.
Configure Stamp Settings
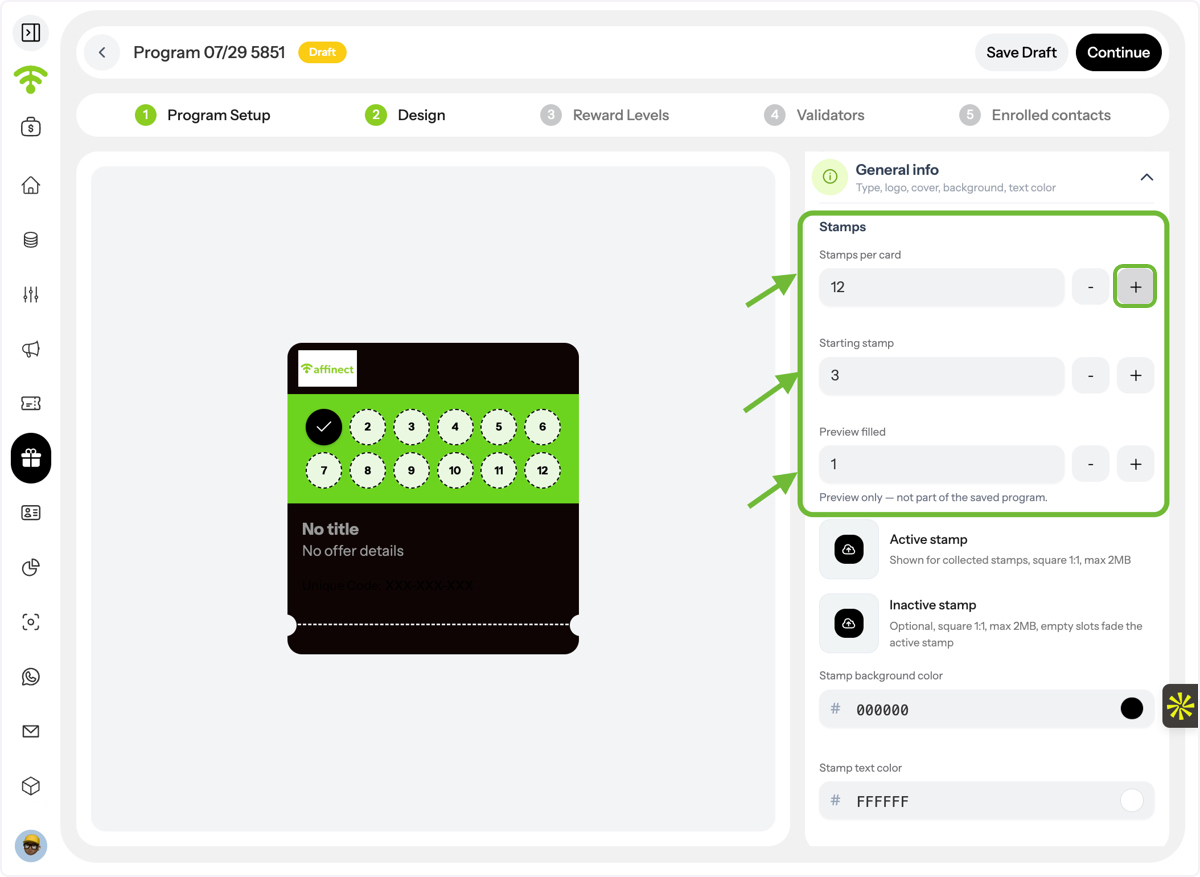
Choose how your digital stamp card works.
You can configure:
- Total number of stamps (up to 12)
- Starting Stamps – the number of stamps guests receive immediately when they first join the program. This is useful for welcome promotions or giving guests a head start.
- Preview Filled Stamps – displays sample completed stamps while you're designing the card. This only affects the preview and does not impact the live program.
Customise Stamp Design
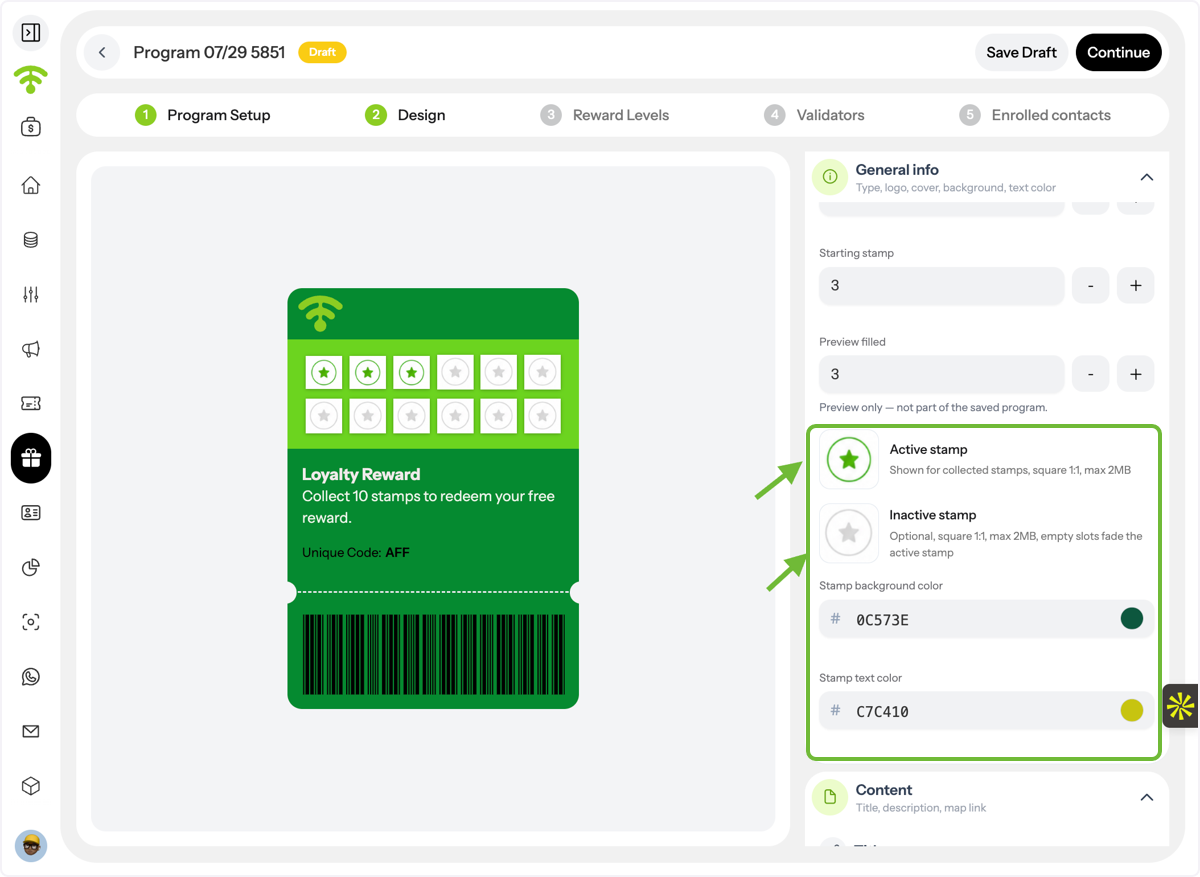
Upload custom images for both:
- Active Stamp
- Inactive Stamp
For best results, ensure your images match the recommended dimensions.
You can also customise:
- Stamp background colour
- Stamp text colour
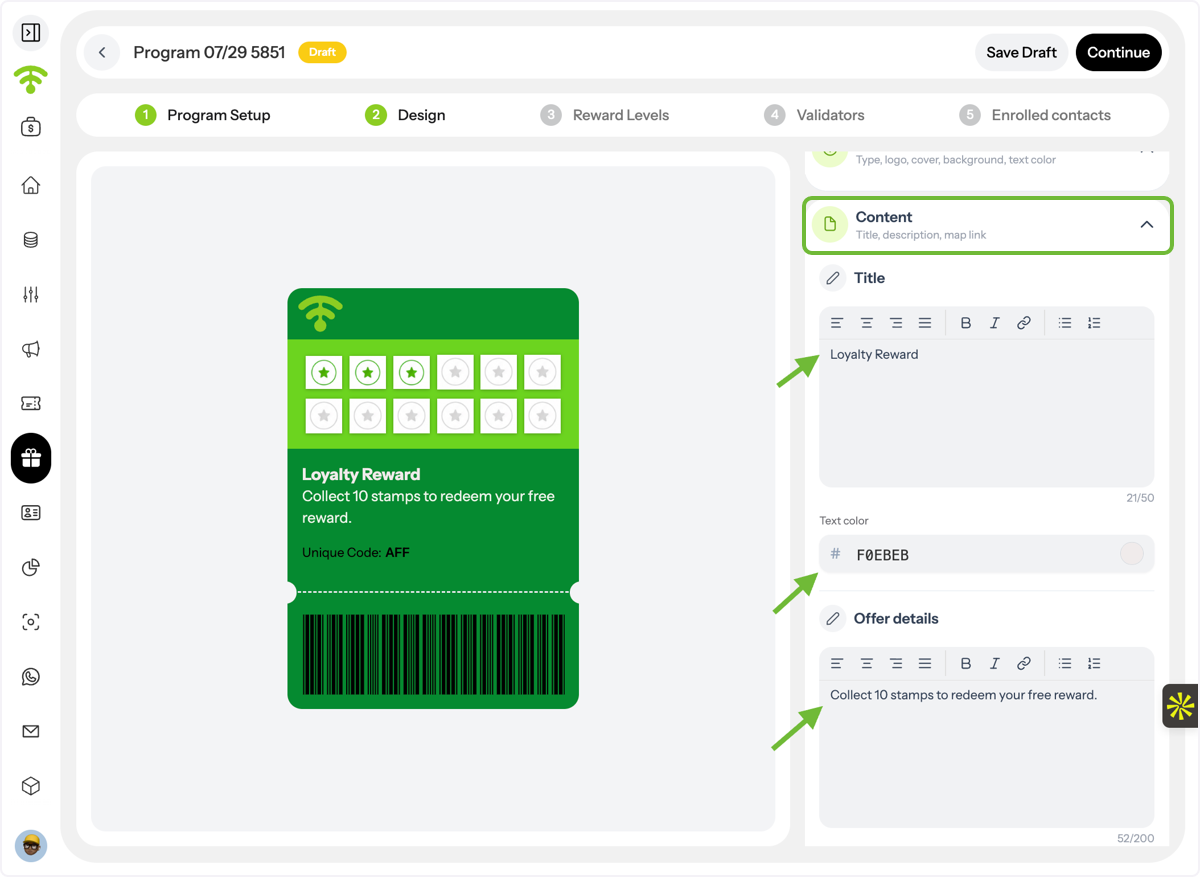
Add Program Content
Enter the information guests will see on their loyalty card.
This includes:
- Program title
- Offer details or reward description
You can also customise the text colour.
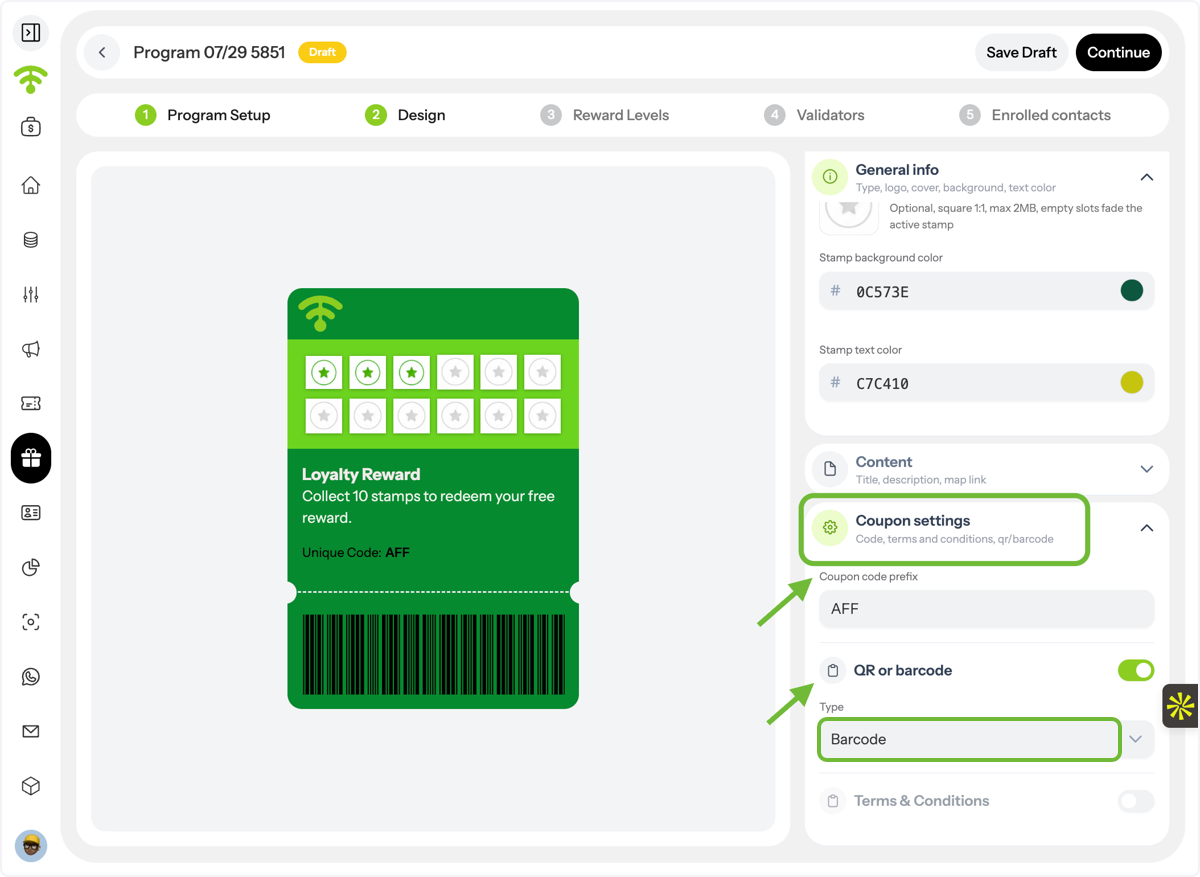
Configure Redemption Settings
Under Coupon Settings, configure how rewards are redeemed.
Options include:
- Coupon code prefix
- QR Code or Barcode format
- Terms & Conditions (optional)
Reward Levels
Review Reward Analytics
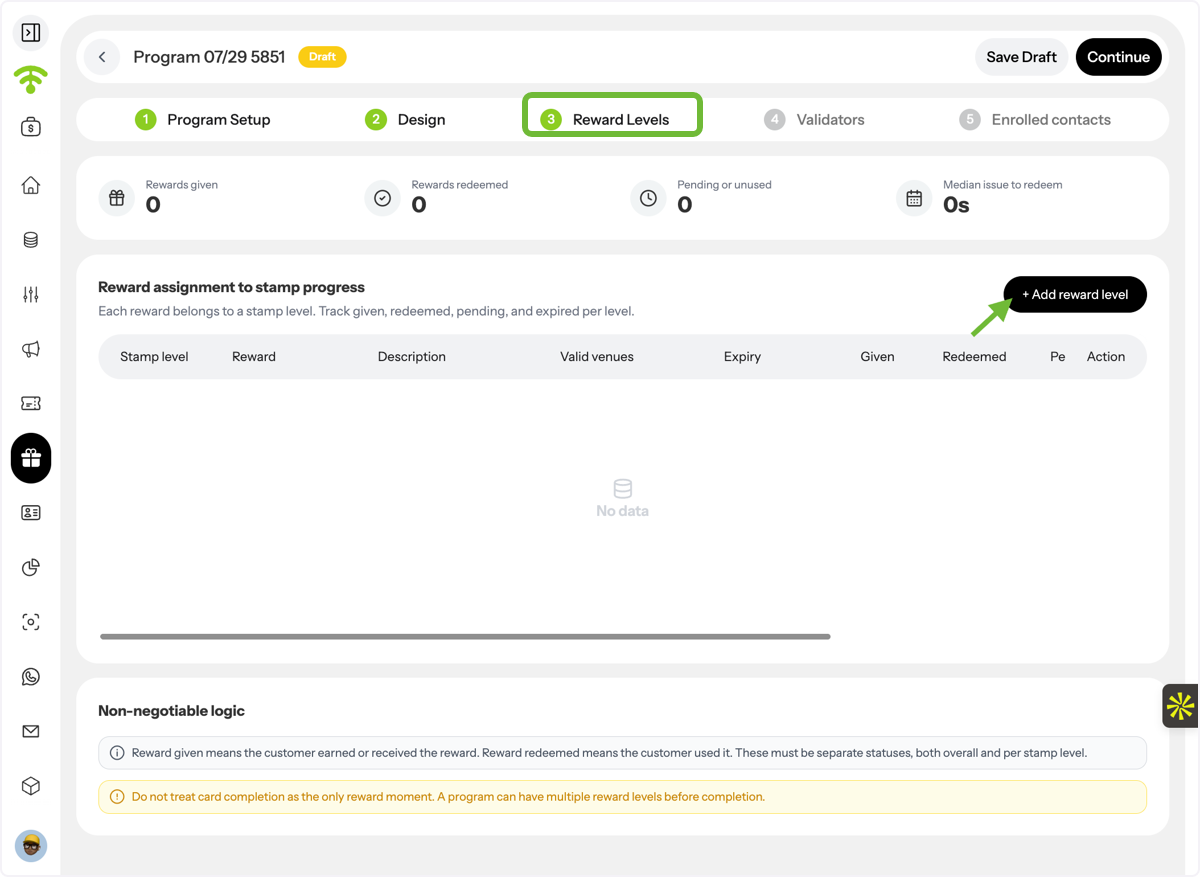
The Reward Levels page includes an overview of your program performance.
You'll see:
- Stamp Progress – how guests are progressing towards rewards
- Rewards Issued – rewards that have been earned
- Rewards Redeemed – rewards that have been successfully claimed
- Pending Rewards – rewards waiting to be redeemed
- Unused Rewards – rewards that expired or were never redeemed
- Median Issue to Redeem – the median amount of time it takes guests to redeem a reward after it has been issued. This helps you understand how quickly customers typically claim their rewards.
Add Reward Levels
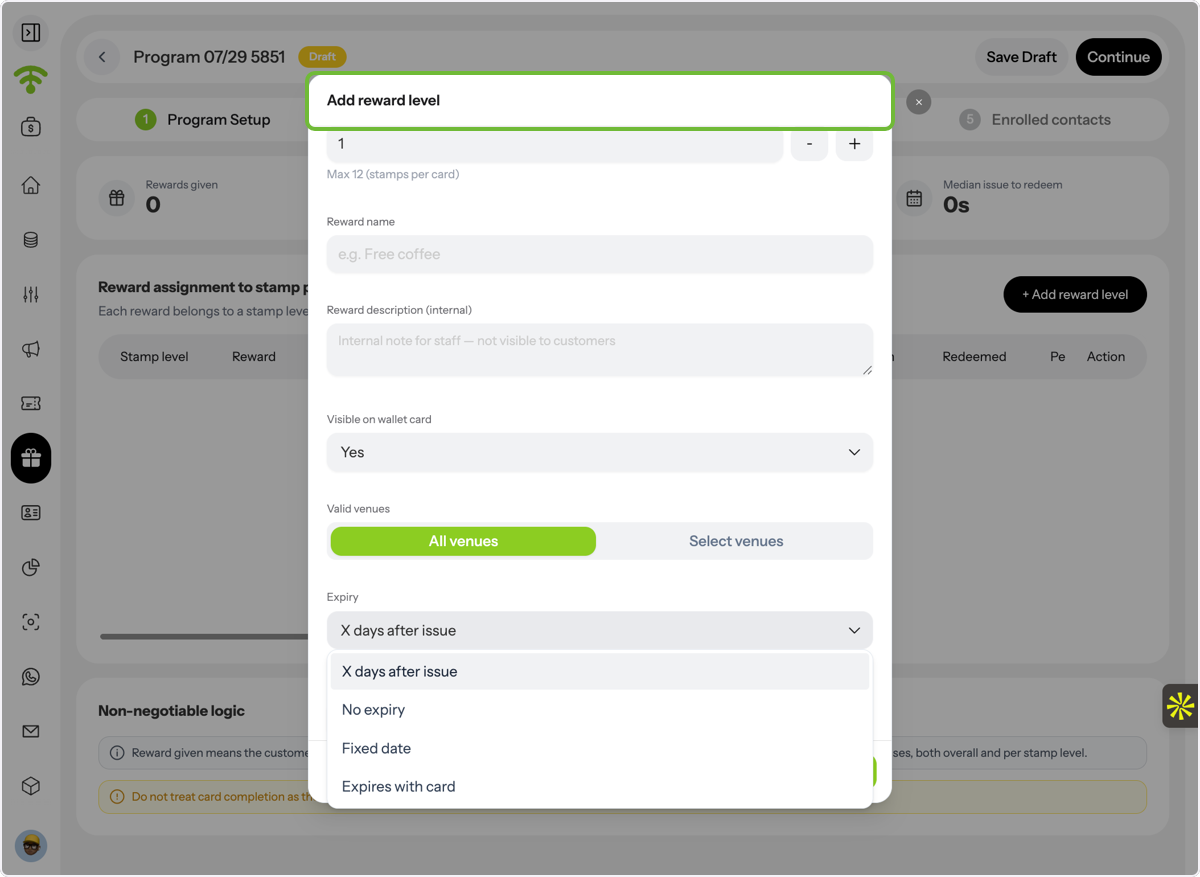
Create one or more reward milestones by defining:
- Number of stamps required to unlock the reward
- Reward name
- Reward description
- Whether the reward is visible on the wallet card
- Eligible venues
- Reward expiry date
Guests will automatically unlock rewards once they collect the required number of stamps.
Validators
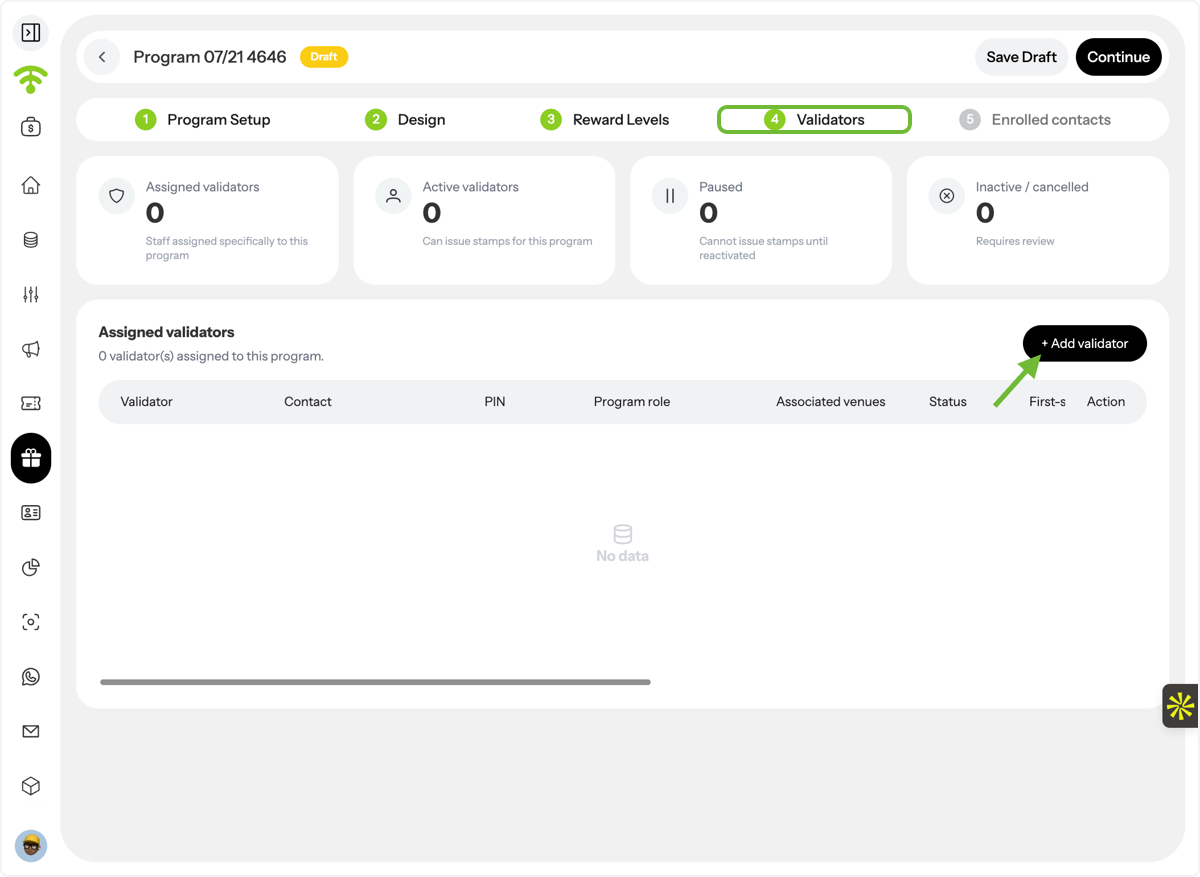
Manage Validators
The Validators page provides an overview of all assigned validators.
You can view their status, including:
- Active
- Assigned
- Paused
- Cancelled
You can also add additional validators at any time.
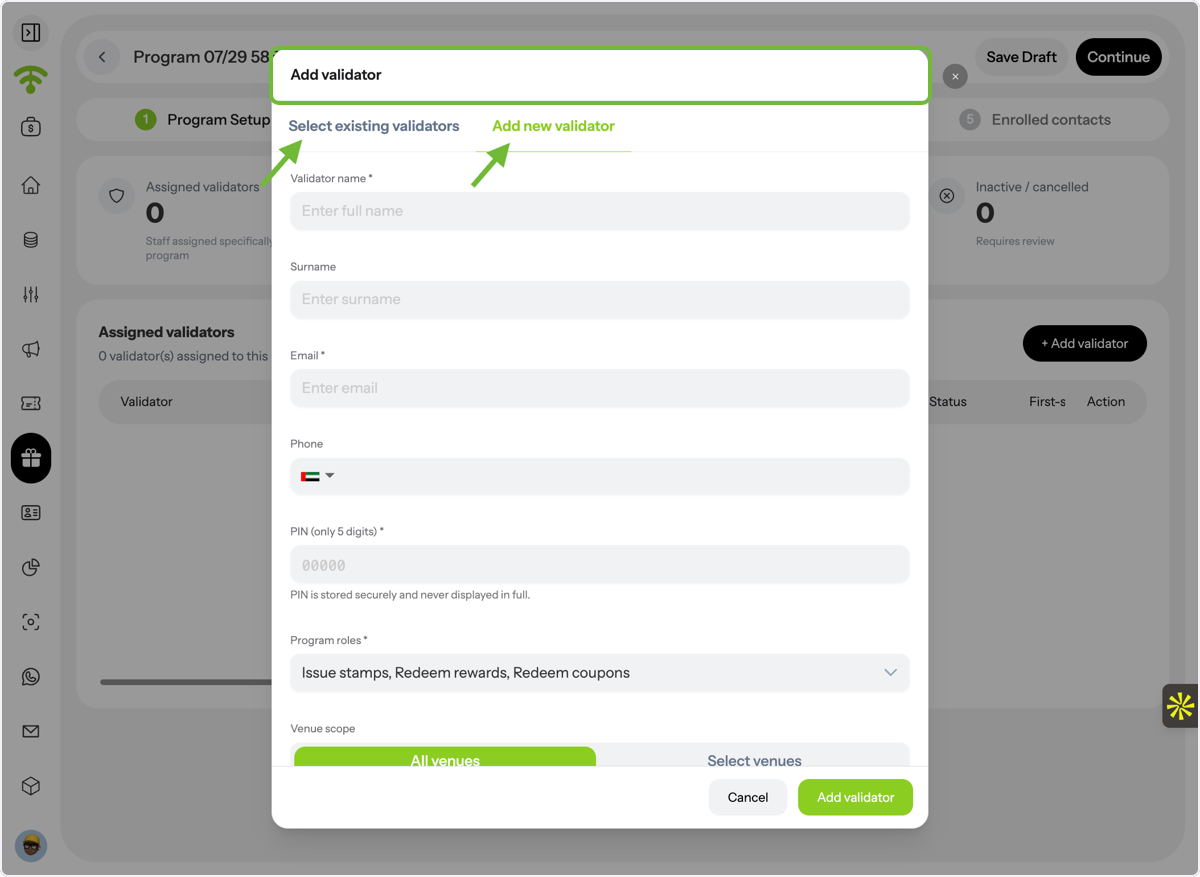
Select or Create a Validator
Choose an existing validator from your organisation or create a new validator. Validators are responsible for issuing stamps and validating reward redemptions.
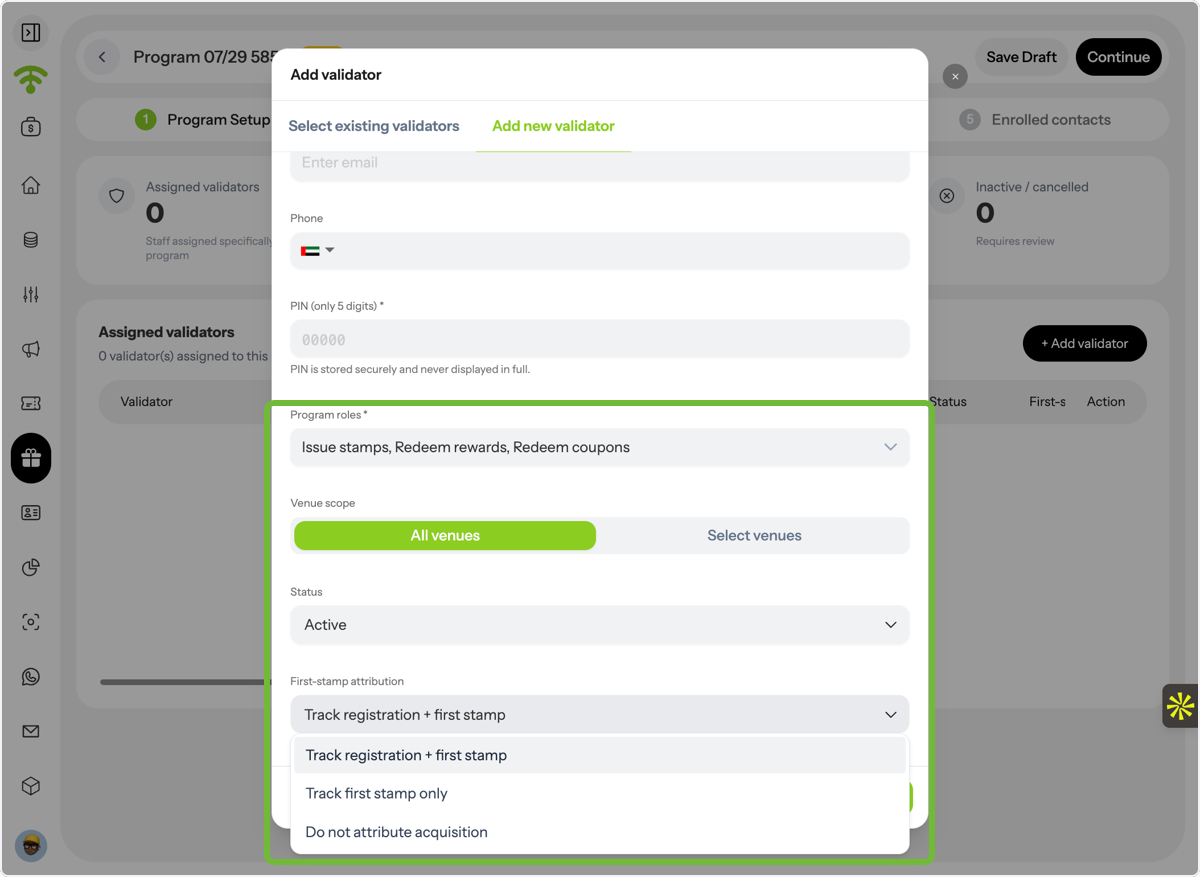
Assign Validator Permissions
Configure each validator by selecting:
- Their program role
- Their First Stamp Attribution, which determines how the first stamp is issued to newly enrolled guests.
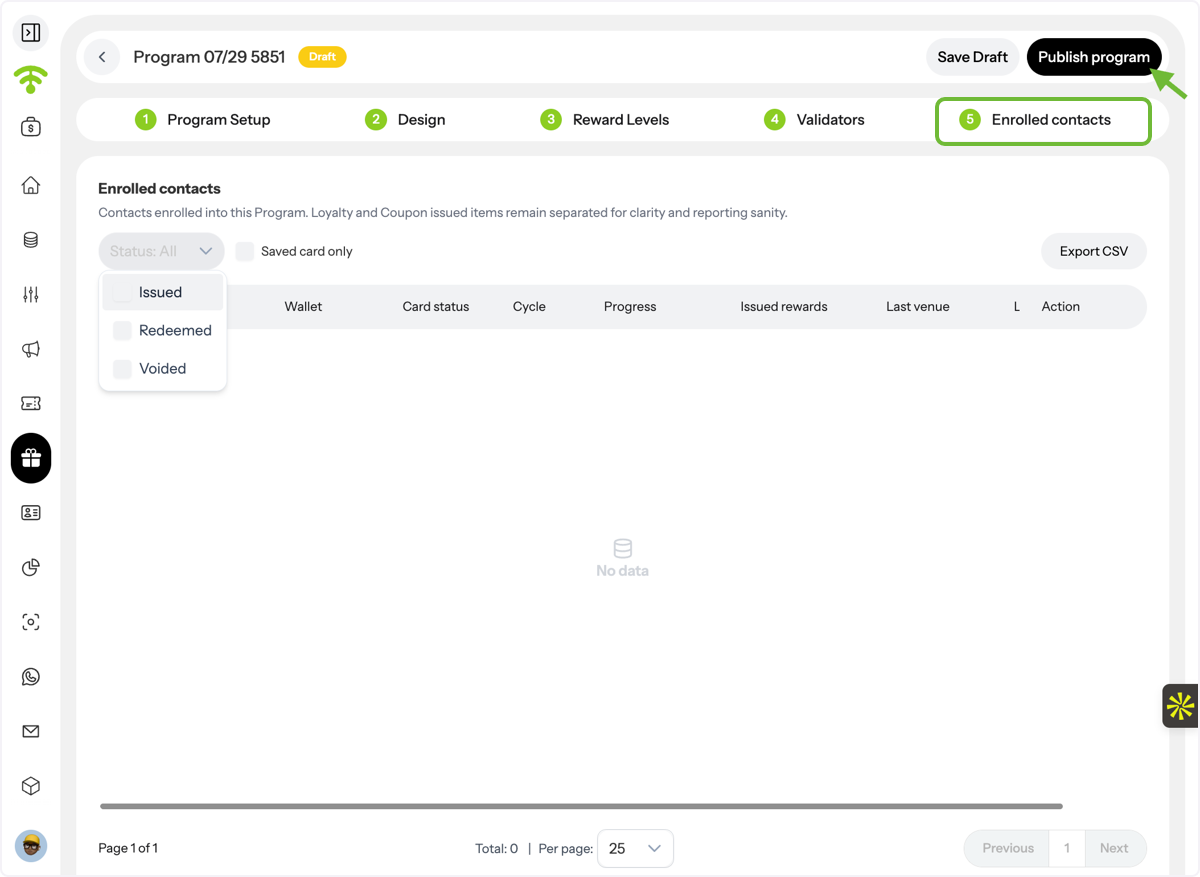
Enrolled Contacts
Review Enrolled Contacts & Publish
The Enrolled Contacts section provides an overview of all guests enrolled in the loyalty program.
You'll be able to view:
- Cards issued
- Rewards redeemed
- Voided cards
- Saved wallet cards
You can also export your enrolled contacts for reporting or further analysis.
Once you've reviewed your settings, click Publish in the top-right corner to make your loyalty program live.
Tada! Your digital stamp loyalty program is now ready for guests to start collecting stamps and unlocking rewards.